The post XAMPP local server tutorial how to create local server appeared first on Cyber Hyena.
]]>XAMPP local server Controls for the individual components of your test server can be reached through the XAMPP Control Panel. The clear user interface logs all actions and allows you to start or stop individual modules with a single. The XAMPP Control Panel also offers you various other buttons, including:
- Config: allows you to configure the XAMPP as well as the individual components
- Netstat: shows all running processes on the local computer
- Shell: opens a UNIX shell
- Explorer: opens the XAMPP folder in Windows Explorer
- Services: shows all services currently running in the background
- Help: offers links to user forums
- Quit: closes the XAMPP Control Panel
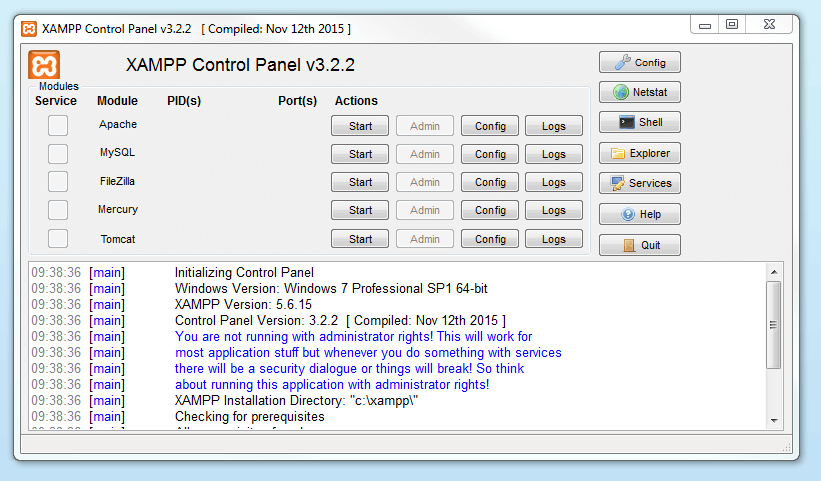
Starting modules
Individual modules can be started or stopped on the XAMPP Control Panel through the corresponding buttons under ‘Actions’. You can see which modules have been started because their names are highlighted green under the ‘Module’ title.

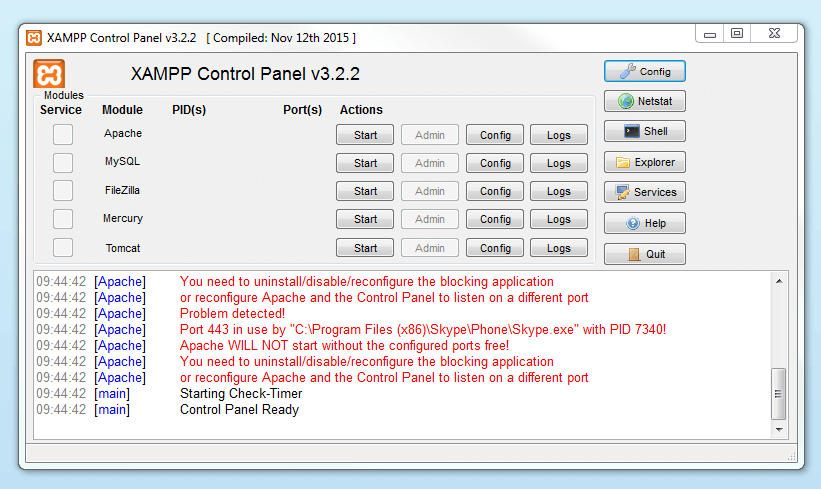
If a module can’t be started as a result of an error, you’ll be informed of this straight away in red font. A detailed error report can help you identify the cause of the issue.
Setting up XAMPP
A common source of error connected with Apache is blocked ports. If you’re using the standard setup, then XAMPP will assign the web server to main port 80 and the SSL port 443. The latter of these particularly is often blocked by other programs. In the example above, it’s likely that the Tomcat port is being blocked, meaning the web server can’t be started. There are three ways to solve this issue:
- Change the conflicting port: Let’s assume for the sake of example that the instant messenger program Skype is blocking SSL port 443 (this is a common problem). One way to deal with this issue is to change Skype’s port settings. To do this, open the program and navigate via ‘Actions’, ‘Options’, and ‘Advanced’, until you reach the ‘Connections’ menu. You should find a box checked to allow Skype access to ports 80 and 443. Deselect this checkbox now.
- Change the XAMPP module port settings: Click the Config button for the module in question and open the files httpd.conf and httpd-ssl.conf. Replace port number 80 in httpd.conf and port number 443 in httpd-ssl.conf with any free ports, before saving the file data. Now click on the general Config button on the right-hand side and select ‘Services and Ports Settings’. Customize the ports for the module server to reflect the changes in the conf files.
- End the conflicting program: The simplest way to avoid port conflicts in the short term is to end the conflicting program (Skype in this case). If you restart Skype after your XAMPP module servers are already running, it will select a different port and your issue will be resolved.
Module administration
You have an ‘Admin’ option located on the Control Panel for every module in your XAMPP.
- Click on the Admin button of your Apache server to go to the web address of your web server. The Control Panel will now start in your standard browser, and you’ll be led to the dashboard of your XAMPP’s local host. The dashboard features numerous links to websites for useful information as well as the open source project BitNami, which offers you many different applications for your XAMPP, like WordPress or other content management systems. Alternatively, you can reach the dashboard through localhost/dashboard/.
- You can use the Admin button of your database module to open phpMyAdmin. Here, you can manage the databases of your web projects that you’re testing on your XAMPP. Alternatively, you can reach the administration section of your MySQL database via localhost/phpmyadmin/.
Testing your XAMPP installation
To check whether your test server is installed and configured correctly, you have the option to create a PHP test page, store them on your XAMPP’s local host, and retrieve them via the web browser.
- Open the XAMPP directory through the ‘Explorer’ button in the Control Panel and choose the folder htdocs (C:\xampp\htdocs for standard installations). This directory will store file data collected for web pages that you test on your XAMPP server. The htdocs folder should already contain data to help configuration of the web server. But you should store your own projects in a new folder (like ‘Test Folder’ for example).
- You can create a new PHP page easily by using the following content in your editor and storing it as test.php in your ‘ test’ folder (C:\xampp\htdocs\test):
<html>
 <head>
  <title>PHP-Test</title>
 </head>
 <body>
  <?php echo '<p>Hello World</p>'; ?>
 </body>
</html>- The last step now is to open your web browser and load your PHP page via localhost/test/test.php. If your browser window displays the words ‘Hello World’, then you’ve successfully installed and configured your XAMPP.
The post XAMPP local server tutorial how to create local server appeared first on Cyber Hyena.
]]>